Seamless communication inside your office keeps days humming along smoothly, boosts productivity, and ensures patients get the best care possible. All too often, however, dental teams find themselves relying on shouts down the hall, expensive third-party applications, and the hope that someone on the team will remember to pass on information. If this is what your practice is doing, stop! Practice-Web includes all kinds of intraoffice communication features, but you might not realize they’re there… particularly if your intraoffice communication is lacking in the first place.
On this page, we’ll go over three of the most helpful intraoffice communication tools that come in Practice-Web at no additional cost, so you can start using them and streamlining your communication right away.
1. Instant Messaging

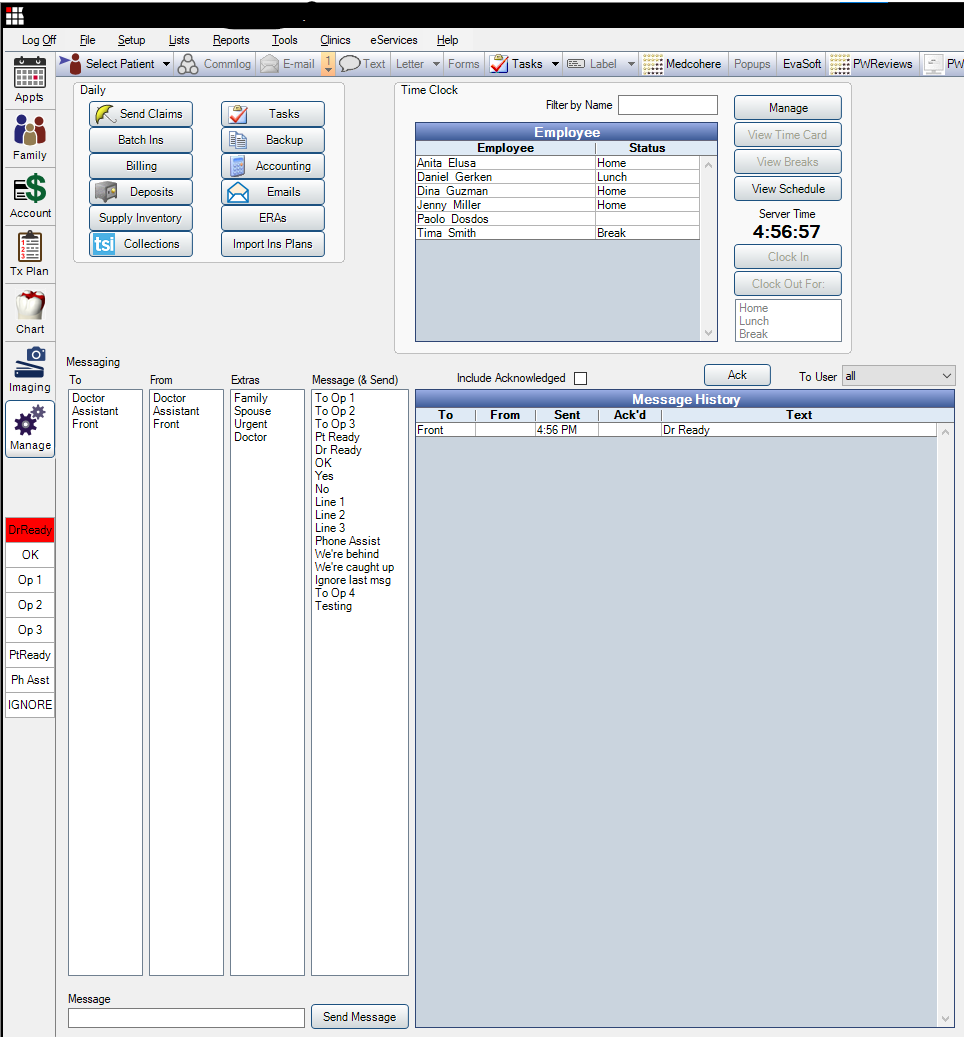
Did you know that the grid at the top left of Practice-Web isn’t just for good looks? The individual squares light up with the color of your choice when someone has an intraoffice message waiting.
The whole setup is completely customizable, so you can send a message to any computer a specific user is logged into, individual workstations, or everyone at once. You can also customize colors, add notification sounds (including your own voice reading a message), create standard messages, and send custom messages on the fly.

To access the messaging center, just go to the Manage Module. Everything you see in the example, including the “To,” “From,” “Extras,” and “Message” fields is customizable by going to Setup, Manage, and either Messaging or “Messaging Buttons.”
Here are some ways you can use Instant Messaging:
- To notify the doctor that a hygiene patient is ready for an exam and what operatory to go to.
- To notify the doctor that his patient is ready for treatment and what operatory to go to.
- To notify a staff member that they have a personal or business call.
- To inform the front office that the back office is running behind.
- To let a staff member know they can go on lunch.
- To notify the treatment coordinator that a patient is ready for their treatment plan.
- To request that the dentist come to an operatory for an emergency.
- To let the back office know when a patient has called to say they’re running late or not coming.
- To bring everyone together for your morning huddle.
The options are endless.
2. Wiki
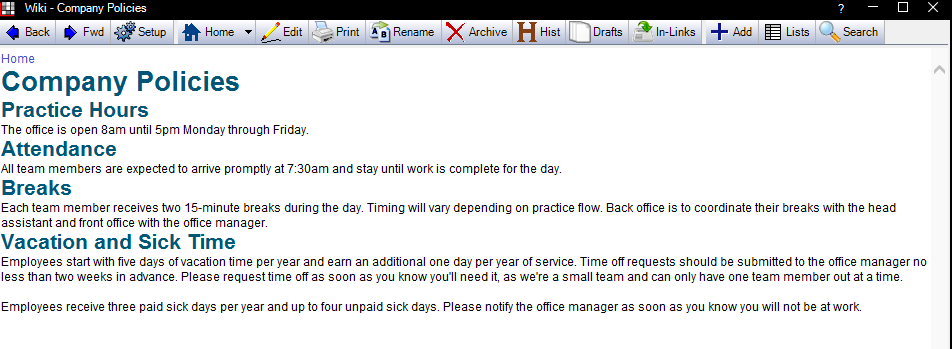
Practice-Web’s Wiki feature works similar to Wikipedia. Look for it under “Tools” in the main menu or press the “Ctrl” key along with the “Shift” and “w” keys. It’s a great place to store information that your team may need to reference.

Wiki pages can host:
- Text
- Images
- Links to other Wiki pages, documents stored on your server, or external web pages
- Lists
They’re also searchable, so it’s easy for team members to find information quickly.
Here are some ways you can use the Wiki:
- Document your practice policies.
- Document office duties and processes or create checklists.
- Design office training manuals.
- Create emergency contact lists.
- Create vendor lists with contact info.
- Create pages for each team member with the info they need, job descriptions, and shortcuts.
- Track time off and vacation requests.
Your Practice-Web Wiki is visible to anyone who has access to your software, so it’s not a good place for sensitive information like passwords or employee social security numbers. However, it’s ideal for anything else you might want to add to your customizable practice knowledge hub.
3. Tasks
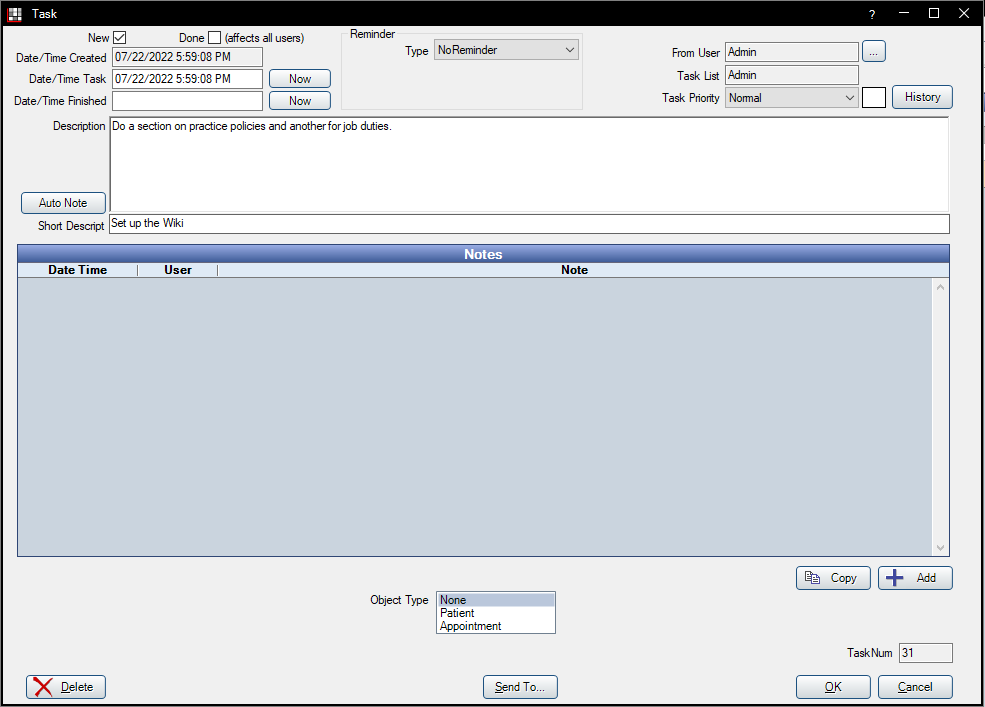
Want to make sure the team completes specific tasks or keep track of your own to-do list? Use the Tasks feature. Individual tasks can be sent to a user inbox or added to a Task List that team members can subscribe to. Plus, you can attach web links, files stored on your server, Wiki pages, and patients to Tasks. If a patient is attached, you’ll see the Task in the patient’s Progress Notes in the Chart Module. Team members receive a pop-up notification with an audible alert when they’re logged in and a new Task is assigned to them to ensure the Task receives the attention it deserves.


You’ll find the button for creating, viewing, and managing Tasks in the Manage Module and in the toolbar at the top of Practice-Web. Note that a highlighted number appears with a dropdown when there are Tasks for a user to address.

Customizations for the feature are under Setup in the Main Menu. From there, you can enable Task Lists on each workstation, choose “Always show the task list” to dock tasks to the bottom or right of Practice-Web, and set up individual inboxes.
Here are some ways you can use Tasks:
- Keep track of your own to-do list. Add things like following up on specific claims, finalizing your schedule for the upcoming year, placing orders, and updating your UCR fees.
- Assign tasks to individual team members. Depending on the team member, this can be anything from reminding them to take out the trash to putting in their time off requests, calling a patient to see how they’re doing after treatment, or completing additional training.
- Assign tasks to groups. Create a Task List, such as “Front Office,” and have everyone in the front office subscribe to it. Then, add Tasks that team members can complete in their downtime, such as tossing old magazines or watering plants.
- Create a Task List for a process. For example, you may want to name one “Admin’s End of Year,” then create Tasks for all the things you do to close out the year.
Get Help Setting Up Your Intraoffice Communication Tools
Our team is happy to train you on the features outlined here and help you get them set up. If you’re not already signed up for Support, renew here first. Get contact info or open a ticket on our Support page.
Not using Practice-Web yet? These features are only the tip of the iceberg. Our software is loaded with features and tools to help your office run more efficiently, boost production, and increase profit. Request a free demo to learn more.

